
Welcome back to the third module of the Imperfect Action Challenge!
In this module, there’s a guided step-by-step tutorial on how to connect your funnel to a custom domain, set up products in GrooveSell™ and publish your pages online. Now that you’ve made your way through the planning process (Module 1) as well as the design process (Module 2), it’s time to start publishing the pages on a custom domain.
You’ll be using your Groove account (sign up for free if you don’t have one already), for everything you need to generate an income online.
When you have a business online, you want to sell something to generate an income online and be able to process payments. This is an important step in the challenge so don’t procrastinate another day and just get it done!
Good to know stuff before we begin:
- No platinum account needed
- No product needed
- No previous knowledge necessary
- No creatives needed
- No pre-written copy needed
- No (money) investment needed
Module #3 Recap: Setting Up Products in GrooveSell™
If you want to view the entire video with clickable chapters and show notes, watch the replay here.
1. Connecting a custom domain with pages and publishing it
This will be your only financial expense for the duration of this challenge, although it is optional. It is entirely possible to continue without a custom domain! However, there are serious pitfalls of using a subdomain – one of which is that it makes your funnel look less polished and professional. And when it comes to processing payments online, trustworthiness is key and a custom domain helps with that.
- Purchase a custom domain
a. namecheap.com - Check availability of domain names
a. LeanDomainSearch.com
b. Lookup available social media handles too - Use appropriate keywords and make it memorable
- Manage the domain name on your hosting provider
- a. Connect to CloudFlare
b. Select the free plan - Create an account with CloudFlare.com
a. Connect to your hosting provider (namecheap.com)
b. Copy Nameserver1 over into the Custom DNS Settings - Select Improve Security
a. Turn on Automatic HTTPS Rewrites
b. Always turn on HTTPS
c. Finish – Complete - Go to DNS Management for your domain
a. Delete the A and CName record (Edit – Delete) - Add a record
a. Type: CNAME
b. Name: @
c. Target: host10.groovepages.com - Add another
a. Type: CNAME
b. Name: www
c. Target: host10.groovepages.com - Save your changes
a. Site is now connected to CloudFlare - Publish your pages in GroovePages™
a. Type in your domain on Publish Menu
b. Click Publish
2. Editing the aesthetics of your funnel map
It’s time to go back to the funnel map that you created in funnelytics.io in the first module. We are going to make the pages visible by pulling in screenshots of your pages, using your new custom domain, to just make your map pretty. This is not an essential step!
- Select your funnel map
- Double-click on the first page
a. Settings – Mapping – URL
b. Insert your custom domain here
c. Click the camera icon - Repeat for all your pages
3. Setting up the products in GrooveSell™
This is the core of today’s training. Now that your pages are up and running, you’re going to have to set up your product in GrooveSell™ using a product funnel.
With your pages open in one tab, select GrooveSell™ from the list of apps on the left-hand side dropdown menu and open it in a new tab to easily navigate between the two apps.
- Create a New Product Funnel
a. Turn on Marketplace if you’d like to turn on the affiliate program - Add a product
a. Usually this is your freebie, the main product, and the upsell - Edit and configure all the products in GrooveSell™ in the same product funnel, using your pages in GroovePages™, by following the steps:
a. Add pricing
b. Connect payment gateways (GroovePay™ is recommended)
c. Contents (Use a URL with https:)
d. Checkout
e. Post-transaction URL
f. Skip over Fulfillment (covered in the next module)
g. Affiliates
h. Proof widget - Copy the generated Tracking Link
a. Paste it into the Body text of the page in GroovePages™
b. Press enter twice
c. Copy any other tracking links (e.g. Proof widget) beneath it - Return to the main Product Funnel page and find your newly created funnel
a. “Draft Mode”
b. Select the dropdown options and click Make Live
c. Save your subdomain name
d. Once live, you cannot change the name - Manage your funnel
a. The cart icon is now available for each product in the funnel
4. Connecting the products with your pages
Now that you have all the products set up within your product funnel, you need somewhere to send a customer who wants to make a purchase. In other words, connecting the links to the button. This is a relatively simple step!
- Select your live Product Funnel in GrooveSell™ (that you made in Step 3)
- Chose the product and select the cart icon
a. Select your checkout type and steps - Embed the code into your checkout on your page
a. Use a pop up
b. Edit the container to an appropriate layout - Link the pop up to the buttons on your page
a. Configure
b. Copy and paste into the box for the URL link
c. If the Update button is deselected, just push the left/right arrow keys - Create the option to
a. Elements – Text Link – Link to your Thank You Page - Save and publish each page after making the changes above
5. Testing the funnel
Now it’s time to test everything. If done correctly, you can start making money online right now! Exciting, right?
Navigate to your site on your browser and go through the various funnel paths from start to finish, just as a potential customer would. Keep your funnel map on hand so that you can double-check that it is exactly as you intended it to be.
In the next module, we’ll be covering all things fulfillment (remember how we skipped that earlier?) as well as setting up an email sequence in GrooveMail™.
Homework:
“Go through this module step-by-step!”
Complete your product funnel and post a screenshot of your published pages in the Facebook group with #imperfectactionchallenge
Resources:
- Groove: groovefunnels.com
- Buy a domain: Namecheap
- Domain availability: LeanDomainSearch
- Website infrastructure: CloudFlare
- Funnel planner: Funnelytics
#imperfectactionchallenge community spotlight:
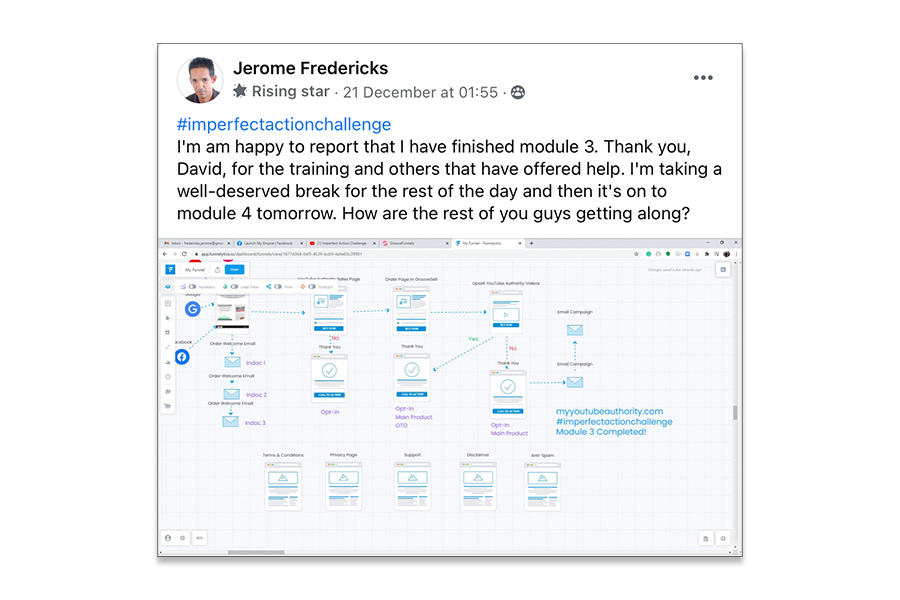
Jerome Fredericks
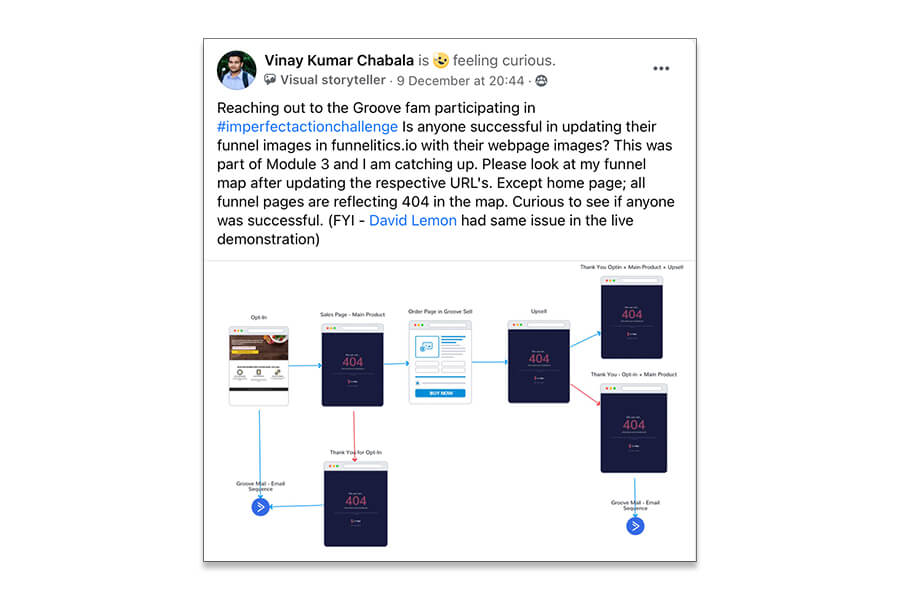
Vinay Kumar Chabala

Leave A Comment